


| Product Code: | |
| Options: | |
| Qty: | |
| Unit Price: | £ |
| Part No: | ENACC-BKT-TB-NF |
| Manufacturer No: | ACC-BKT-TB-NF |
| Delivery: | In Stock: 2-3 Weeks |


 |
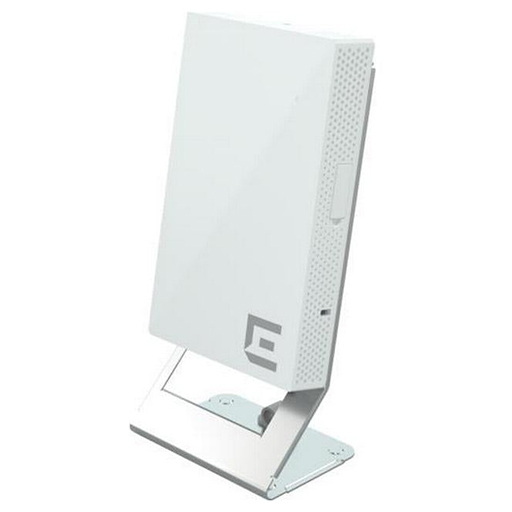
The AP305C/CX access point can be mounted on a 15/16 in. wide ceiling rail using the ACC-BKT-TB-NF adapter, when the ceiling tile protrudes below the T-bar. The AP305C/CX access point comes with in-built clips in the back of the access point that attach directly on to the -NF adapter, eliminating the need for the -TB accessory.
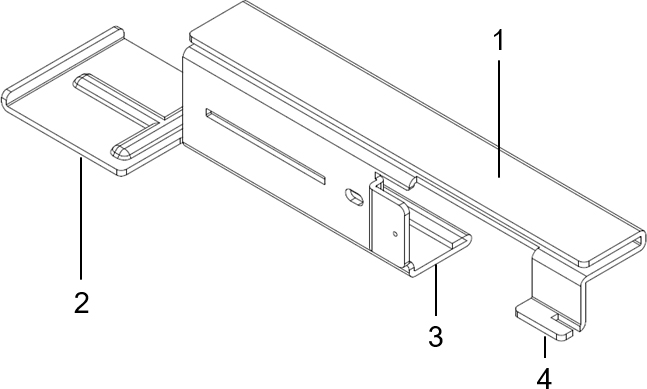
| Callout | Description |
|---|---|
| 1 | Adapter guide for ceiling rail attachment |
| 2 | Adapter end |
| 3 | Indent for - NF second part attachment |
| 4 | Adapter tabs |
*When the adapter parts are attached properly, the adapter ends will line up after the two halves have snapped together.
The AP305C/CX access point can be mounted on a 15/16 in. wide ceiling rail using the ACC-BKT-TB-NF adapter, when the ceiling tile protrudes below the T-bar. The AP305C/CX access point comes with in-built clips in the back of the access point that attach directly on to the -NF adapter, eliminating the need for the -TB accessory.
| Callout | Description |
|---|---|
| 1 | Adapter guide for ceiling rail attachment |
| 2 | Adapter end |
| 3 | Indent for - NF second part attachment |
| 4 | Adapter tabs |
*When the adapter parts are attached properly, the adapter ends will line up after the two halves have snapped together.
Product data is provided by Icecat, we do not warrant the accuracy of the material above.