| Product Code: | |
| Options: | |
| Qty: | |
| Unit Price: | £ |
| Part No: | APCNBHN1356 |
| Manufacturer No: | NBHN1356 |
| Delivery: | In Stock: 2-3 Weeks |


 |
NetBotz 13.56 MHz Handle Kit
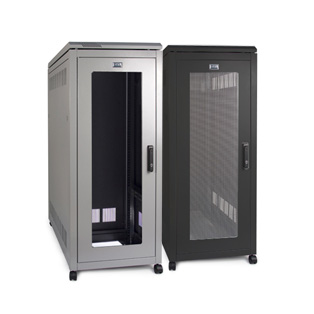
Network appliances enabling remote or local access monitoring and control for your NetShelter SX enclosures
Includes: Installation guide
User-selectable password with strong password rules and reset password mechanism.
Share access without risking unauthorized configuration changes.
Pinpoint the timing and sequence of events leading up to an incident with the event log.
Grant equipment access for specific times for each proximity card configured.
Grant authorized people access to equipment through proximity card authentication.
View the user interface with a browser. Gives quick access from anywhere on the network without the need to install software.
Provides a simple telnet session or SSH for remote battery management access.
Override electronic access with a hard key for power outages and maintenance.
An IT-ready, scalable access monitoring system that collects, organizes, and distributes critical alerts, surveillance video and key information, providing a unified view of complex physical infrastructure environments from anywhere on the network.
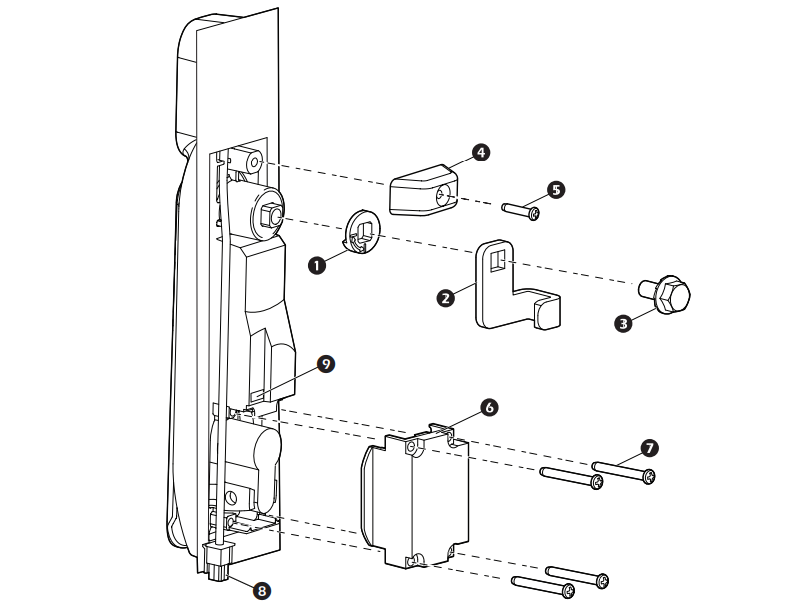
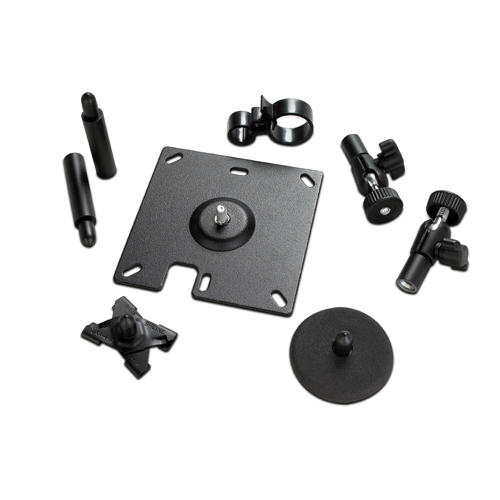
1. Rotation limiter
6.
Bottom mounting bracke
2. Cam from your rack
7. M3x25 Phillips mounting screws (4)
3. Cam screw
8. Proximity reader connector
4. Top mounting bracket
9. Lock connector port
5. M3x14 Phillips mounting screw
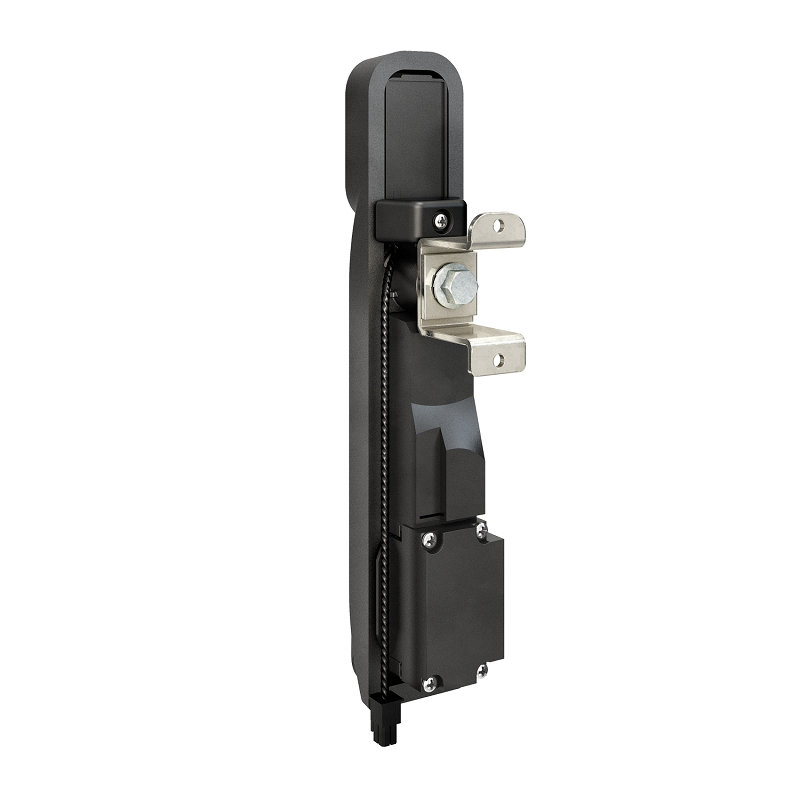
1. Remove the existing rack handles (see “Remove the front door handle” on page 4 or “Remove the rear door handle” on page 4). Remove the cam from the door handle, and save it for step 5.
2. Slide the new handle through the opening in the door.
3. With the swing handle closed, position the rotation limiter (1) with the arrows in the lower right corner for right-hand mounting, or in the lower left for left-hand mounting. Ensure the swing handle moves toward the inside of the rack in the open position. Reposition the rotation limiter if necessary.
4. Attach the top mounting bracket (4) with the M3x14 Phillips screw (5).
5. Reattach the cam 2) with the cam screw (3), or use the cam screw to attach the cam provided for your rack.
6. Attach the bottom mounting bracket (6) using four M3x25 Phillips screws (7), with the tab on the right for right hand mounting, or on the left for left hand mounting. NOTE: Make sure the handle wire is outside the mounting bracket and does not interfere with the latch. Do not crimp the wire during installation.
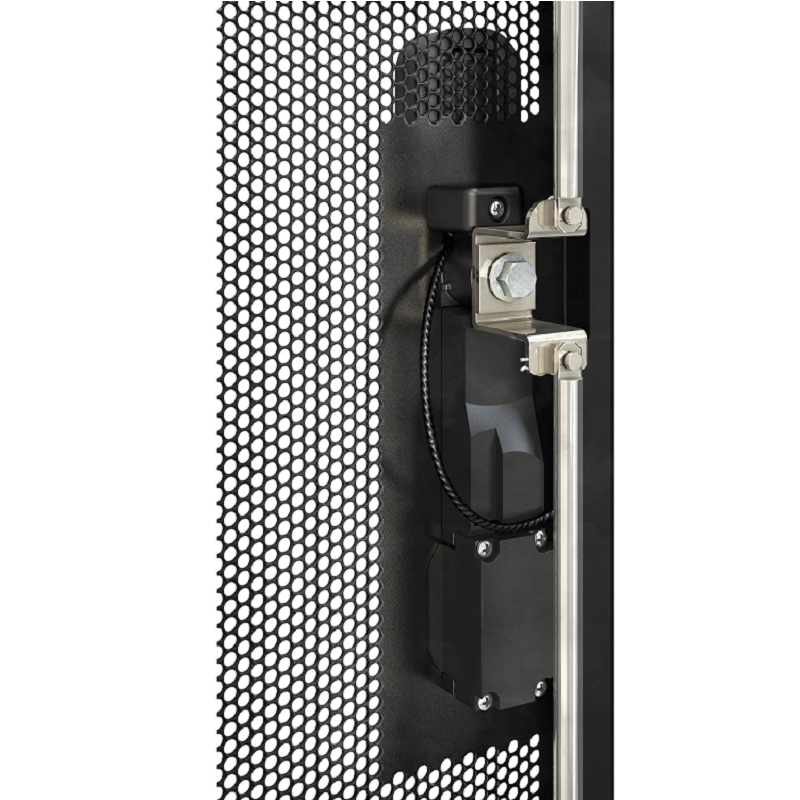
7. Attach the included cable assembly to the proximity reader connector on the handle wire (8) and the lock connector port (9) on the handle. Route the cable assembly through the rack door. NOTE: Only use the cable assembly that came with the Handle Kit.
8. At the hinge between the door and the rack, use the RJ45/RJ45 coupler to connect the cable assembly to the CAT5 cable.
9. Continue routing the CAT5 cable through the rack.
10. Connect the cable to the appropriate port on a compatible NetBotz appliance.
Additional information can be found in the User Guide PDF file
NetBotz 13.56 MHz Handle Kit
Network appliances enabling remote or local access monitoring and control for your NetShelter SX enclosures
Includes: Installation guide
User-selectable password with strong password rules and reset password mechanism.
Share access without risking unauthorized configuration changes.
Pinpoint the timing and sequence of events leading up to an incident with the event log.
Grant equipment access for specific times for each proximity card configured.
Grant authorized people access to equipment through proximity card authentication.
View the user interface with a browser. Gives quick access from anywhere on the network without the need to install software.
Provides a simple telnet session or SSH for remote battery management access.
Override electronic access with a hard key for power outages and maintenance.
An IT-ready, scalable access monitoring system that collects, organizes, and distributes critical alerts, surveillance video and key information, providing a unified view of complex physical infrastructure environments from anywhere on the network.
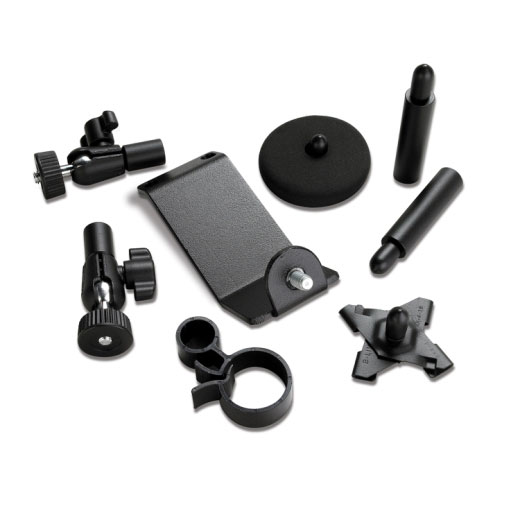
1. Rotation limiter
6.
Bottom mounting bracke
2. Cam from your rack
7. M3x25 Phillips mounting screws (4)
3. Cam screw
8. Proximity reader connector
4. Top mounting bracket
9. Lock connector port
5. M3x14 Phillips mounting screw
1. Remove the existing rack handles (see “Remove the front door handle” on page 4 or “Remove the rear door handle” on page 4). Remove the cam from the door handle, and save it for step 5.
2. Slide the new handle through the opening in the door.
3. With the swing handle closed, position the rotation limiter (1) with the arrows in the lower right corner for right-hand mounting, or in the lower left for left-hand mounting. Ensure the swing handle moves toward the inside of the rack in the open position. Reposition the rotation limiter if necessary.
4. Attach the top mounting bracket (4) with the M3x14 Phillips screw (5).
5. Reattach the cam 2) with the cam screw (3), or use the cam screw to attach the cam provided for your rack.
6. Attach the bottom mounting bracket (6) using four M3x25 Phillips screws (7), with the tab on the right for right hand mounting, or on the left for left hand mounting. NOTE: Make sure the handle wire is outside the mounting bracket and does not interfere with the latch. Do not crimp the wire during installation.
7. Attach the included cable assembly to the proximity reader connector on the handle wire (8) and the lock connector port (9) on the handle. Route the cable assembly through the rack door. NOTE: Only use the cable assembly that came with the Handle Kit.
8. At the hinge between the door and the rack, use the RJ45/RJ45 coupler to connect the cable assembly to the CAT5 cable.
9. Continue routing the CAT5 cable through the rack.
10. Connect the cable to the appropriate port on a compatible NetBotz appliance.
Additional information can be found in the User Guide PDF file
Product data is provided by Icecat, we do not warrant the accuracy of the material above.